Creating a Form Template
To create a template please follow the steps below:
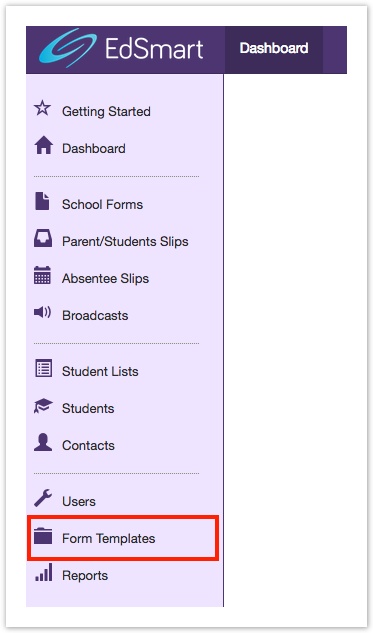
- Go to Form Templates
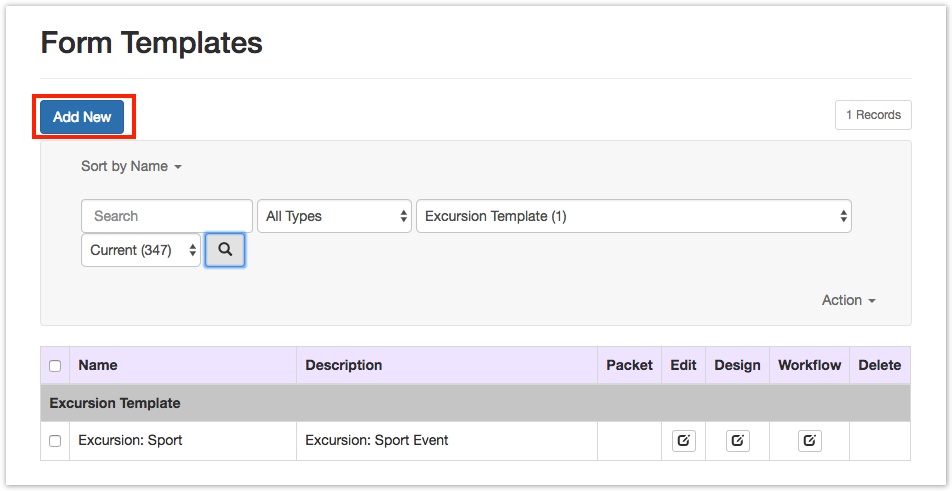
2. Click Add New
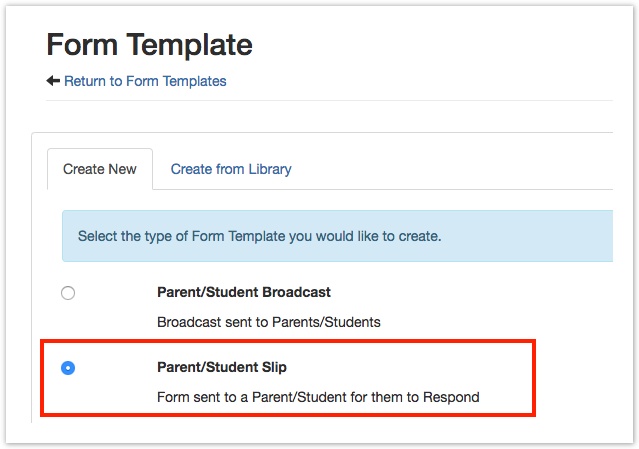
3. Select Parent/Student Slip and click Create New Form Template
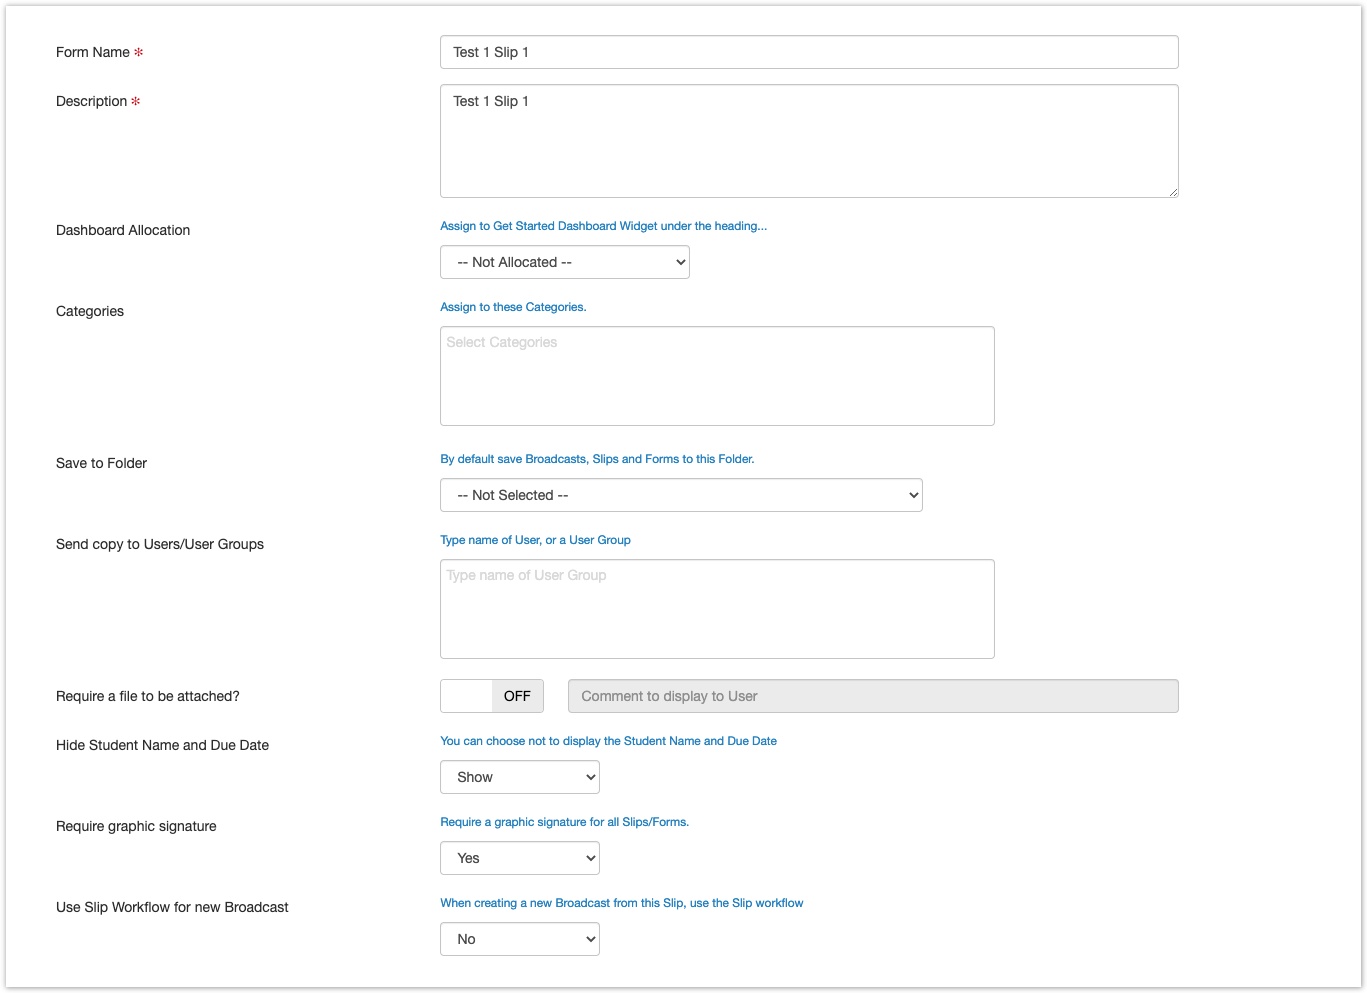
4. Enter the Form Name and Description for the template. If you have created Categories, select which Categories you wish to have the template listed in. If you require a file to be attached when a slip is sent, change 'Require a file to be attached?' to ON. Select the Folder where you wish to save all your Slips created using this template. You can also add other users to 'Send copy to Users/User Groups' so that they will receive a copy of the slip when this Template is used. Graphic signature for a Slip can also be mandatory using the 'Require graphic signature option' set to 'Yes'.
5. Click Add New Form. A Template is now created
6. Click Edit Design
7. Section 2 - Designing a Form Template
More articles in this category:
- Send a School Form to Staff
- Building a Slip Template in EdSmart
- Creating a Form Template
- Designing a Form Template
- Improvements to Form Designer
- Adding an Approval Workflow to a Form Template
- Managing Fields on Form Templates
- Lock and Unlock Fields on Form Workflows
- Managing your Form Template Workflows
- Conditional Workflows
- Allow parents to create multiple forms of the same type
- Form Template Categories - how to create and edit
- Parent Initiated Form (PIF) - Form Template Packets
- Form Template Library
- Duplicate a Form Template
- Process Module
- School Form for Student and Parent Response
- Workflow scenarios for School Form for Student with Parent Response
- Field Configurations in Template Designer
- Validate Feature to enter and capture correct data
- Add a Web Page Link in a Long Description Field
- Parent Slip File Uploads
- Create Slips from the Form Templates page
- How To Create a Form With a Notification That Is Sent To The Form Creator On Behalf Of The User.
- Assign User Groups to Workflow Steps
- Streamlining Template Creation with Default Approval Workflows


