Lock and Unlock Fields on Form Workflows
- Clea Boyd-Eedle (Unlicensed)
- Shashi Sreenivasa (Deactivated)
- Theresa Klunk (Deactivated)
- Teresa Lennie (Deactivated)
The ability to lock and unlock fields offers a powerful way to control a Form as it moves through any number of workflow steps. Take the use case of a Professional Development Form, where a staff member wishes to attend a seminar or undertake some other PD. The workflow might be:
- Staff member completes information about the seminar
- Staff member forwards Form to Department Head for them to confirm budget line; append notes about requirements for another teacher to cover the absence.
- Department Head forwards Form the Deputy Principal for Approval
- Deputy Principal may Approve or Not Approve, and append their own notes.
Thus there are three groups of fields on the Form, and each group can be managed by a different person in the workflow.
Assign Fields to Groups
Fields on a Form Template can be allocated to a Group. When you edit a field you will see an option to allocate the field to a Field Group (1-15). Group 0 means the field is not allocated to a Group.
Can't see Field Groups?
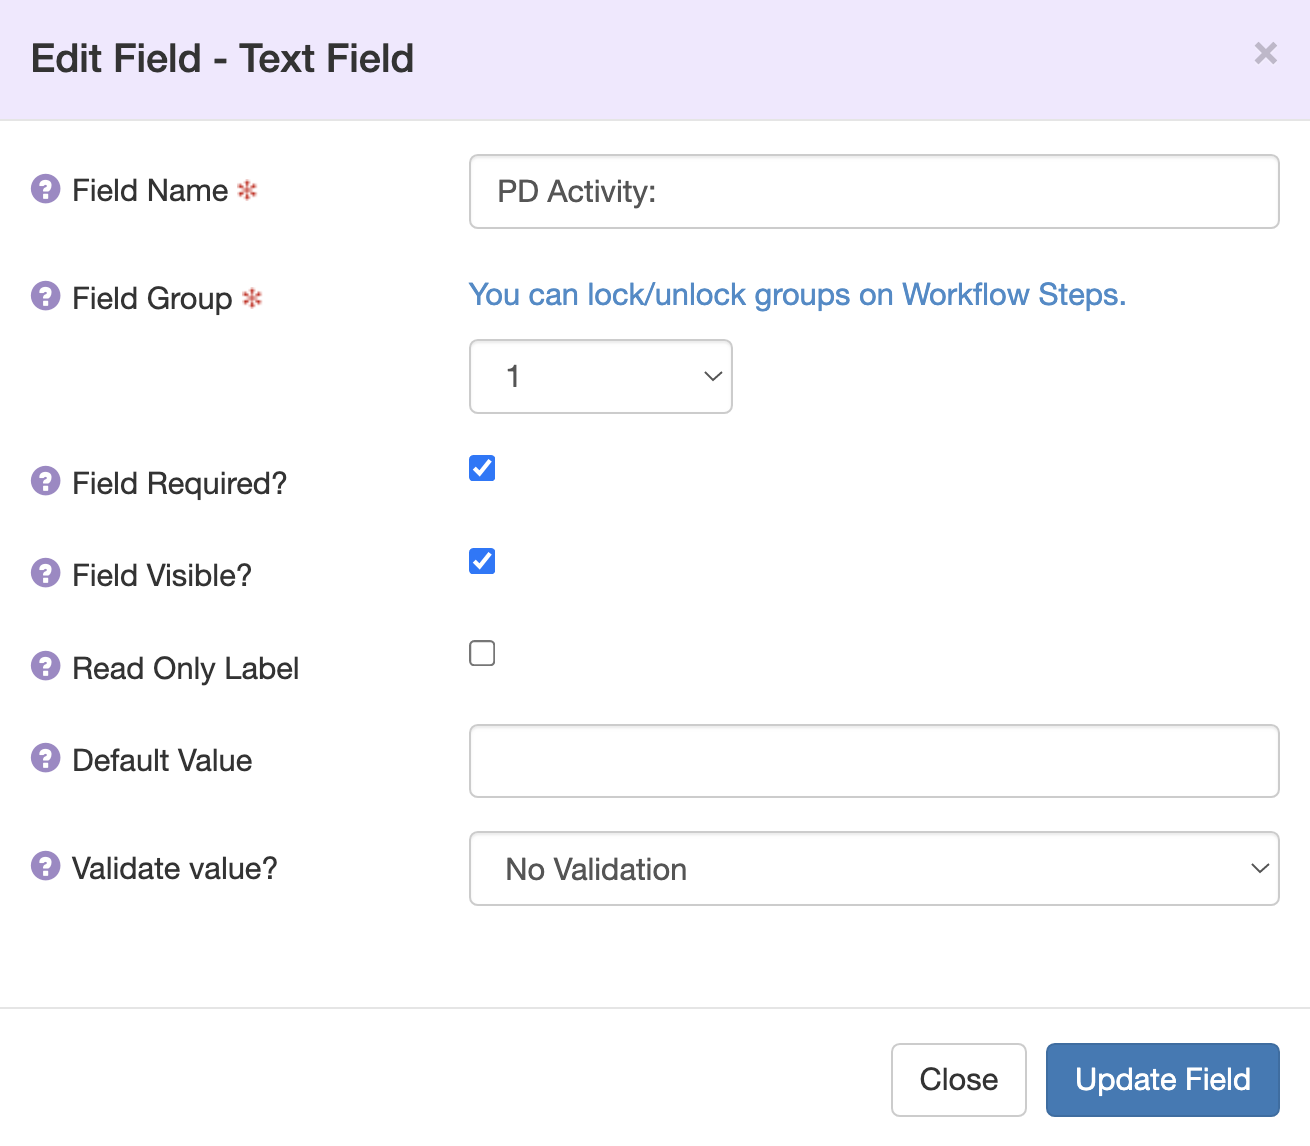
If you allocate Fields to a Group this will be displayed in the Form Builder after you Update Field.
Lock/Unlock Field Groups in Workflow Steps
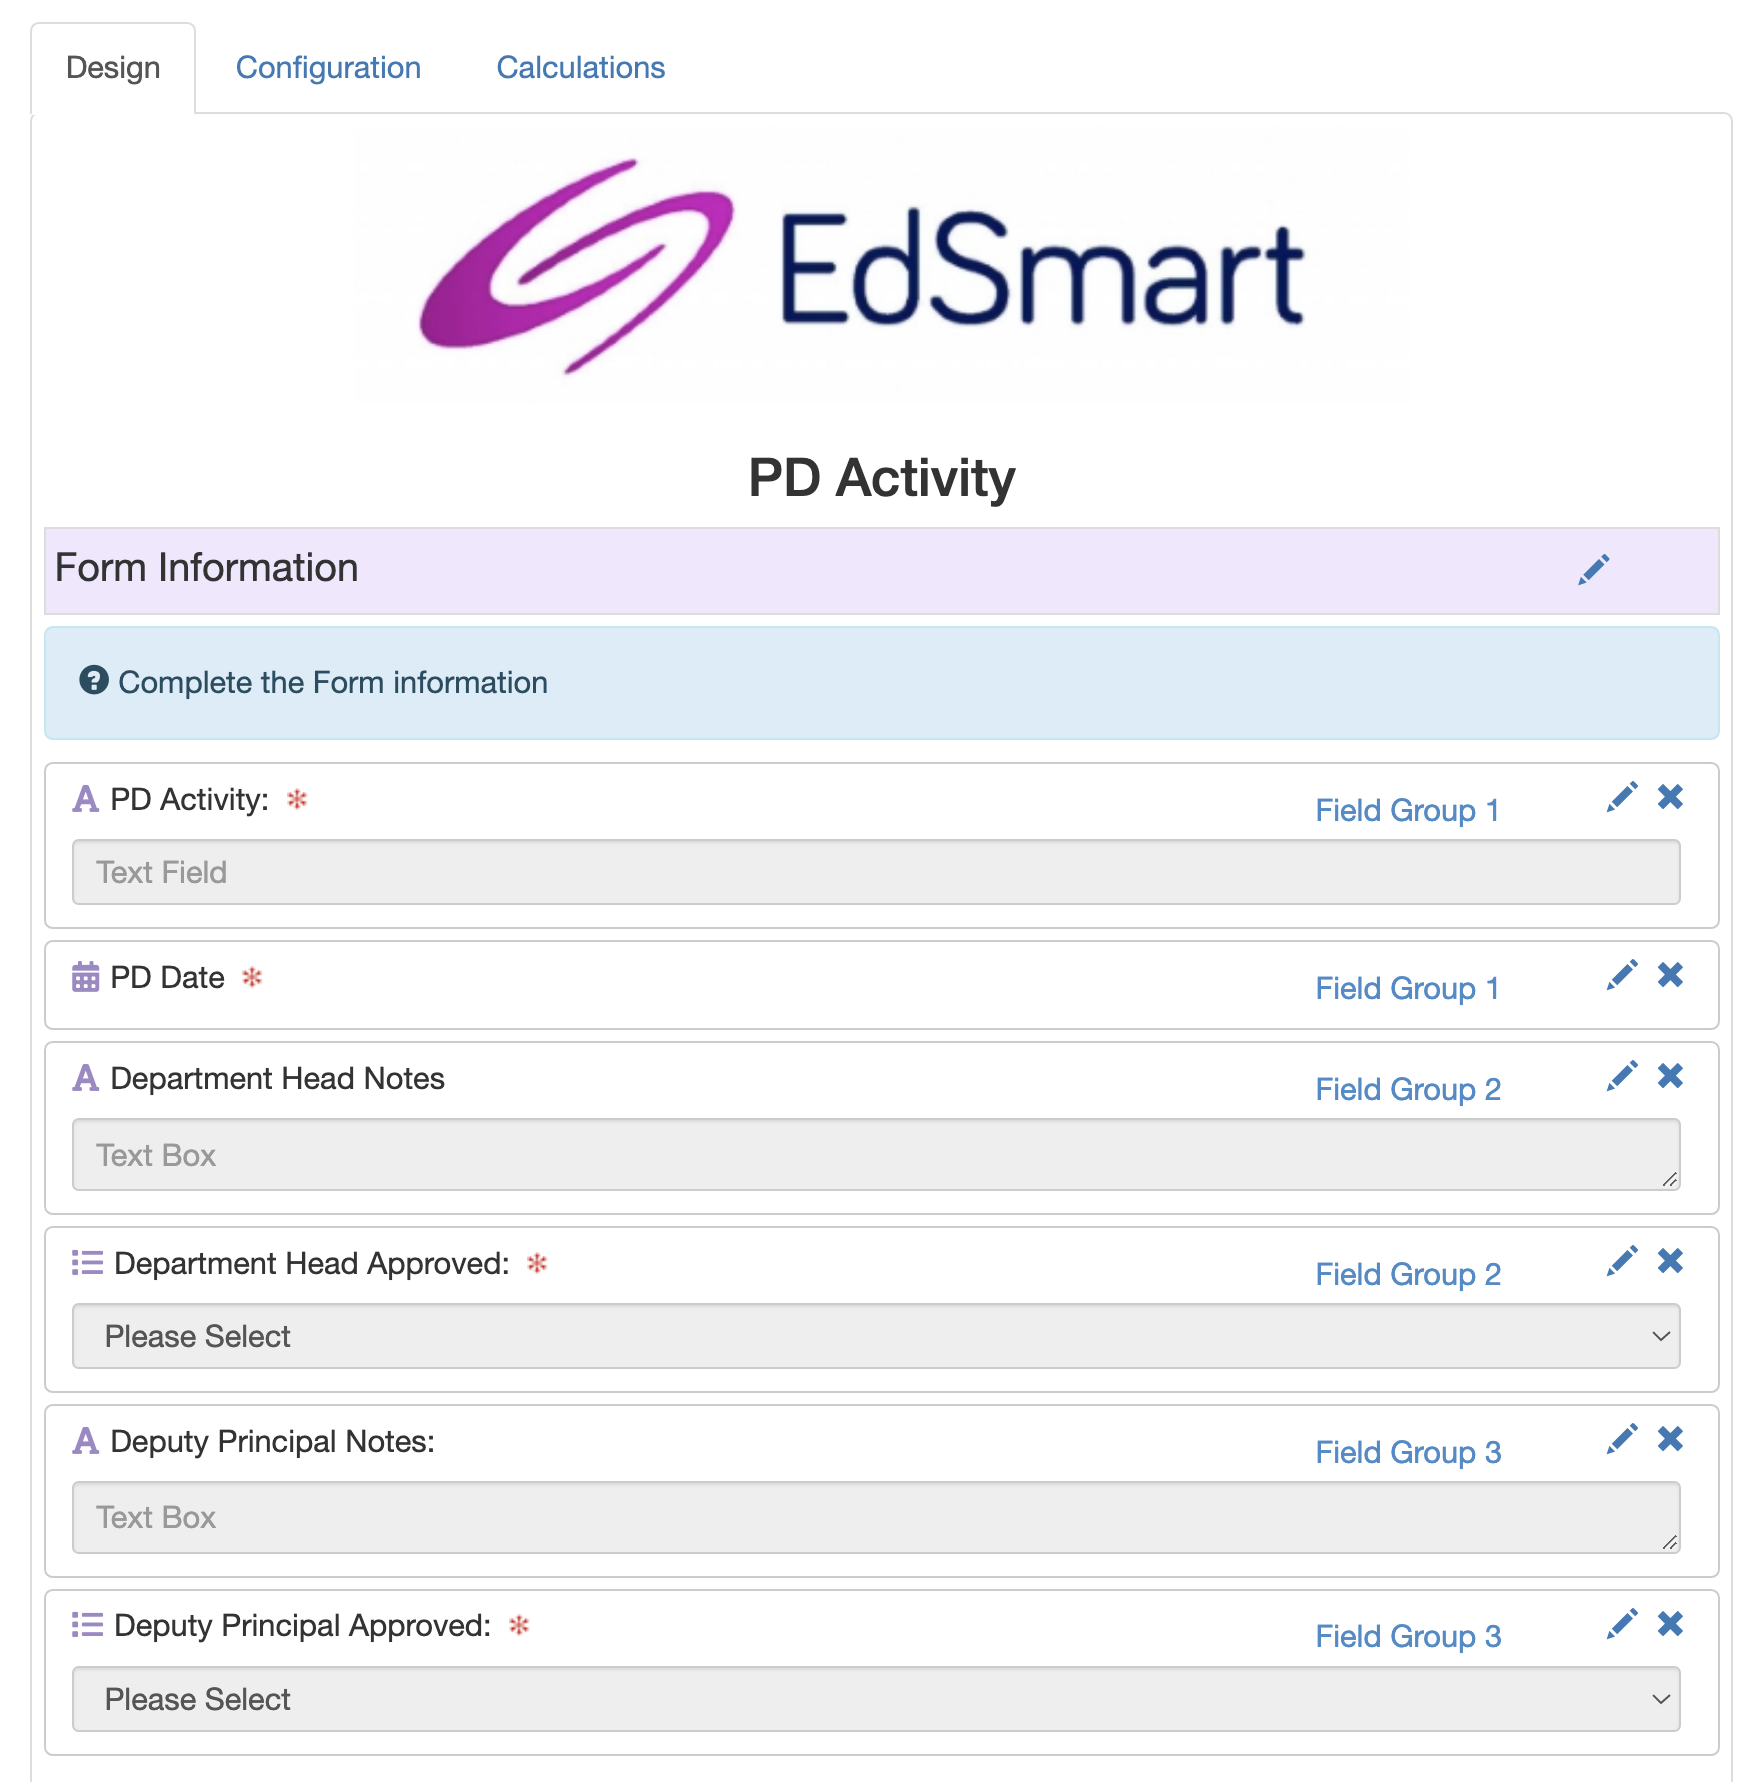
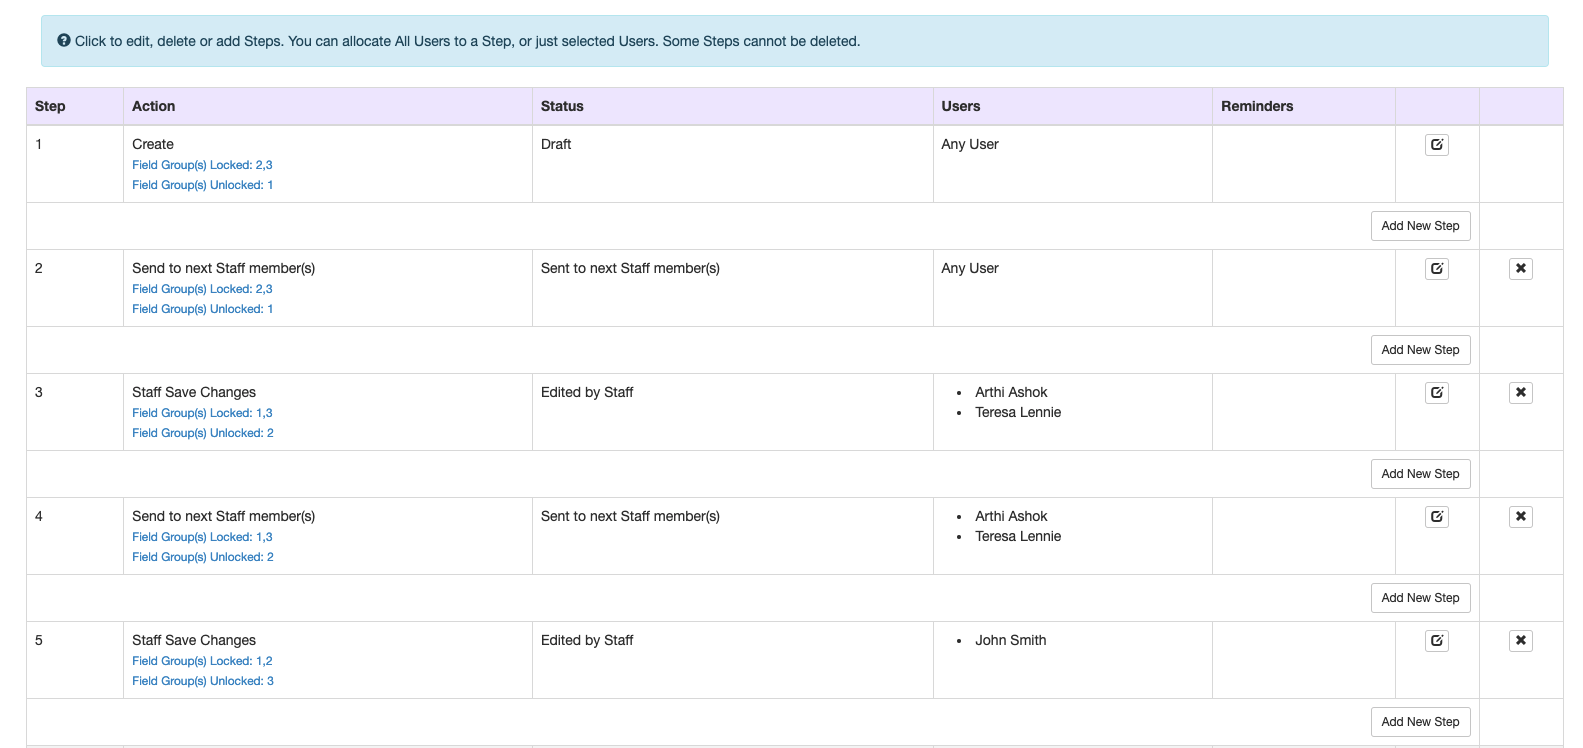
Once you have Fields allocated to Groups, you can manage those Groups from the Workflow. From the below screenshot you can see that Field groups and their status are displayed for each of the steps.
What this means is Forms allow Users access to only the Field Groups that are unlocked for a particular step
For Eg: Arthi and Teresa in Step 3 below will have access to only the Fields that are part of Field group 3 which is unlocked, Fields from Group 1 and 2 will be greyed out.
When either of them completes Step 3 and 4 and send the form to Step 5, John Smith will have access to only fields from Group 3 as it is only group that is unlocked.
Please note it is recommended to maintain status for Groups in the Send Steps similar to their previous steps, so that the User actioning it won't lose access to the fields.
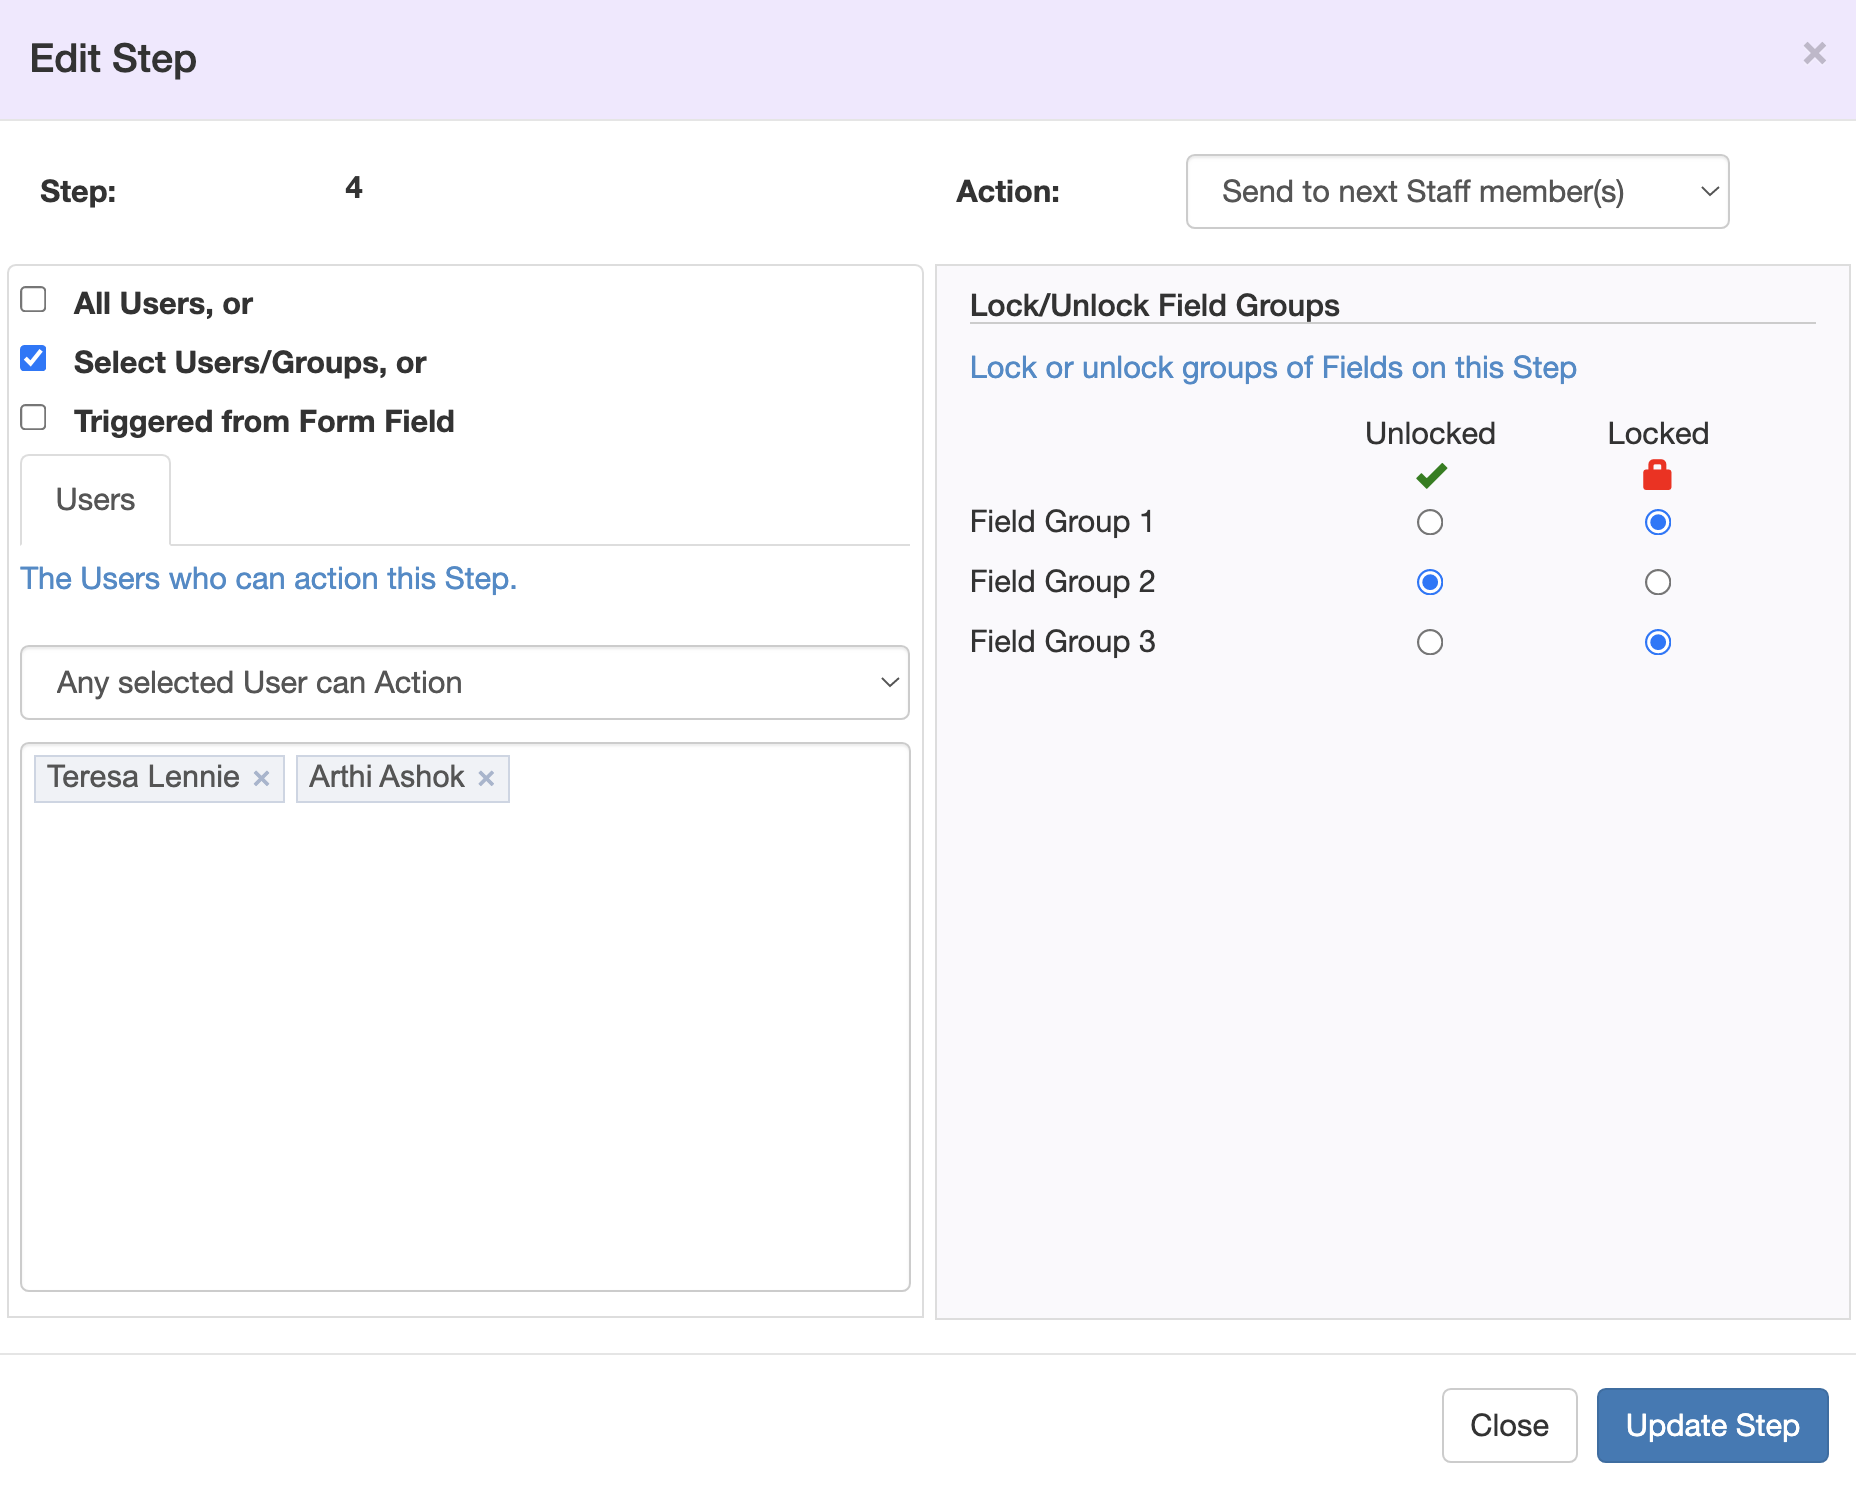
To edit the status for these Groups you need to click on the Edit button on the Workflow steps and select the radio buttons next to the Field Groups.
For example in the screenshot below Group 2 is unlocked and thus editable on Step 4, whilst Groups 1 and 3 are Locked and would not be available to be edited by Users in this Step.
Once all the steps are completed , all the Field Groups will be locked and the Form cannot be edited by any User.
More articles in this category:
- Send a School Form to Staff
- Building a Slip Template in EdSmart
- Creating a Form Template
- Designing a Form Template
- Improvements to Form Designer
- Adding an Approval Workflow to a Form Template
- Managing Fields on Form Templates
- Lock and Unlock Fields on Form Workflows
- Managing your Form Template Workflows
- Conditional Workflows
- Allow parents to create multiple forms of the same type
- Form Template Categories - how to create and edit
- Parent Initiated Form (PIF) - Form Template Packets
- Form Template Library
- Duplicate a Form Template
- Process Module
- School Form for Student and Parent Response
- Workflow scenarios for School Form for Student with Parent Response
- Field Configurations in Template Designer
- Validate Feature to enter and capture correct data
- Add a Web Page Link in a Long Description Field
- Parent Slip File Uploads
- Create Slips from the Form Templates page
- How To Create a Form With a Notification That Is Sent To The Form Creator On Behalf Of The User.
- Assign User Groups to Workflow Steps
- Streamlining Template Creation with Default Approval Workflows