Managing your Form Template Workflows
Workflows are a powerful tool in EdSmart to ensure that the proper permissions are secured before a Slip is distributed to parents, or that certain tasks are completed – for example, for a Victorian state government school enter the information to the DEECD Student Activity Locator. Each template has a workflow associated with it.
The Select User on Workflow feature allows specific Users to be selected as the Slip moves through the workflow.
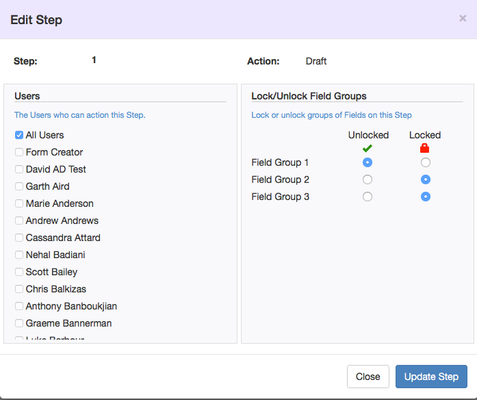
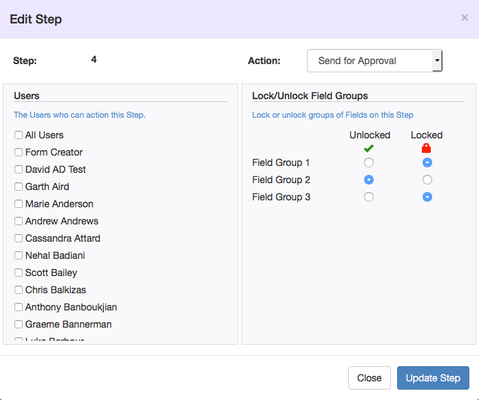
Within a Step fields can be grouped together andlocked or unlocked dependent on the current Step.
To list your Templates, click on Form Templates from the navigation menu.
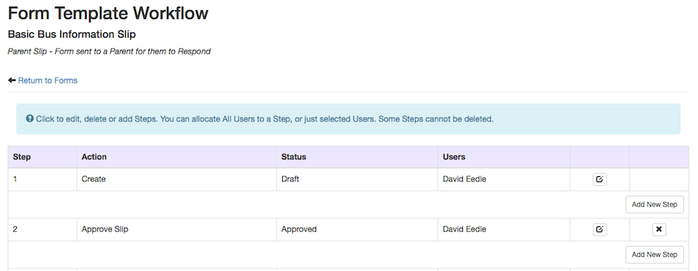
You’ll see an edit option under the Workflow column, this will display the workflow associated with your template.
Depending on the Step type, you can edit various information about the Step. For example, the first Step, ‘Create’, cannot be removed, neither can the ‘Queue’ and ‘Send’ steps as these are required in order to trigger distribution of the Slips. For example, if you click to edit the ‘Create’ step, you’ll see that you cannot edit the Action, but you can allocate which Users can action the Step.
You can insert new steps by clicking the relevant Add New Step button. Typically this is to introduce an Approval step, whereby you want the workflow to move to a particular person (or selection of people) who can approve the sending of a Slip. See this article for tips on adding an Approval Workflow to a Form Template.
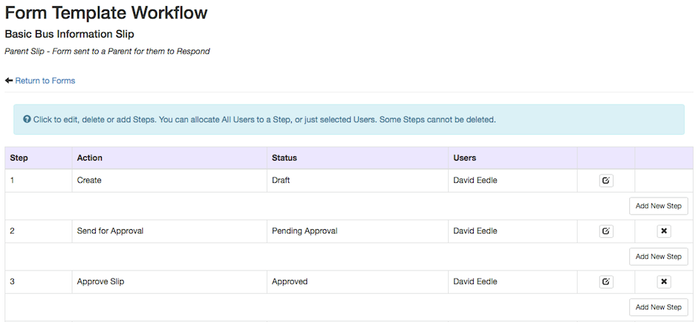
You need two new Steps, firstly the ‘Send for Approval’ step. When this is actioned by the User, it will trigger an email to the ‘approver’ so they are notified that they need to log in and action the Slip. Secondly an ‘Approve’ step, which the approving user(s) will action to show that they have signed off on the Slip. They would then usually action the Queue Slip step. Generally when you add a 'Send for Approval' step the system will automatically add the subsequent 'Approve' step. Thus the workflow might look like this:
If you change your mind, you can delete the Steps you have added.
More articles in this category:
- Send a School Form to Staff
- Building a Slip Template in EdSmart
- Creating a Form Template
- Designing a Form Template
- Improvements to Form Designer
- Adding an Approval Workflow to a Form Template
- Managing Fields on Form Templates
- Lock and Unlock Fields on Form Workflows
- Managing your Form Template Workflows
- Conditional Workflows
- Allow parents to create multiple forms of the same type
- Form Template Categories - how to create and edit
- Parent Initiated Form (PIF) - Form Template Packets
- Form Template Library
- Duplicate a Form Template
- Process Module
- School Form for Student and Parent Response
- Workflow scenarios for School Form for Student with Parent Response
- Field Configurations in Template Designer
- Validate Feature to enter and capture correct data
- Add a Web Page Link in a Long Description Field
- Parent Slip File Uploads
- Create Slips from the Form Templates page
- How To Create a Form With a Notification That Is Sent To The Form Creator On Behalf Of The User.
- Assign User Groups to Workflow Steps
- Streamlining Template Creation with Default Approval Workflows


