...
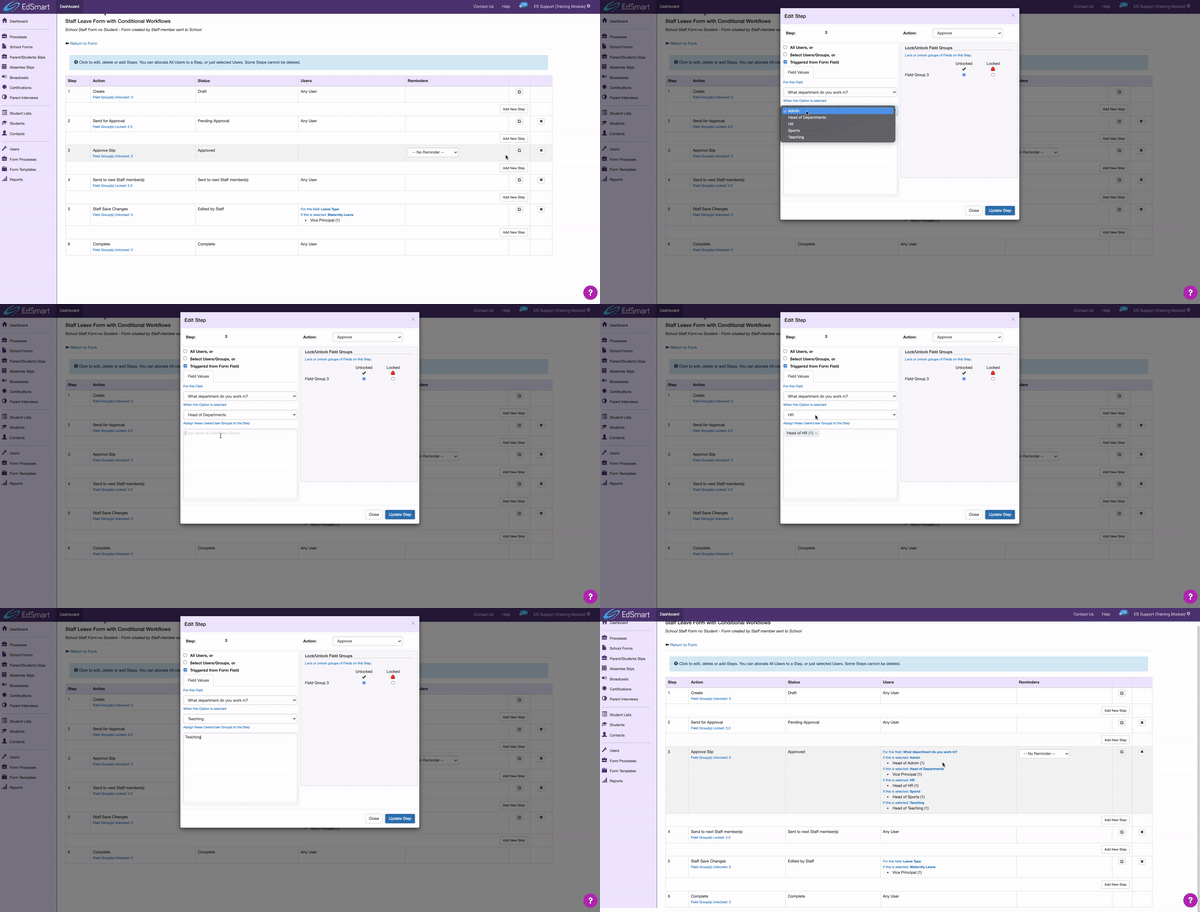
To set up the new workflow, the Template Creator will need to edit the Approve Slip step.
There are now three different types of Approvals to select from but the type used for Conditional Workflows will be Triggered from Form Fields
Then Select the Options List Field you would like to set up the Conditional Workflow e.g. What department Department do you work in?
The Option List field will have multiple options to select from e.g. Admin, HR, Sports, Teaching, Head of Departments.
Assign Approvers for each option by searching in the User/User Groups Field below. e.g. Select Admin then select Head of Admin, Select HR then Select Head of HR, rinse and repeat for all departments.
Select Update Step to save the changes.
Based on the option selected by the Form Creator the Form will be directed to the appropriate approver.
Let’s take a look at the Form Creator experience:
Start the School Form.
Fill in the Form.
Send the Form for Approval.
The form will automatically assign to an Approver based on the Conditional Workflow set upon setup during Form Template creation.
...
